The Virtual Production Workflow: A Practical Guide
The idea of shooting in multiple countries in a single day without leaving the studio sounds impossible, but it’s a reality with virtual production. This technology offers a powerful solution to the logistical and financial headaches of traditional location shoots. By creating digital environments, you eliminate travel costs, weather delays, and the complexities of securing permits. This efficiency is the result of a smarter, more integrated virtual production workflow that front-loads the creative work. This shift not only leads to significant time and cost savings but also provides a more predictable and controlled environment, allowing you to allocate your budget to what truly matters: the story on screen.
Key Takeaways
- Front-Load Your Creative Work: The success of a virtual production hinges on meticulous pre-production. By building your digital worlds and planning shots before filming, you create a predictable and efficient on-set workflow that saves time and prevents surprises.
- Make Creative Decisions Live on Set: Virtual production gives you the power to see near-final shots in real time. This allows directors and cinematographers to adjust lighting, environments, and camera angles on the fly, fostering more creative freedom than traditional methods.
- Rethink Your Budget for Long-Term Savings: While the initial investment in technology can seem high, it strategically reduces costs elsewhere. You save significantly on location travel, set construction, and extensive post-production, leading to a more controlled and cost-effective project.
What is Virtual Production?
At its core, virtual production (VP) is a method of filmmaking that merges the physical and digital worlds in real time. Instead of acting in front of a static green screen and imagining the final scene, performers are placed inside dynamic, interactive digital environments. This is made possible by displaying incredibly realistic 3D sets, often built using powerful game engines like Unreal Engine, on massive LED screens that surround the actors. As the camera moves, the digital background moves with it, creating a seamless and immersive world that everyone on set can see and react to.
This approach fundamentally changes the creative process. It allows filmmakers to build and explore complex digital worlds live on set, making decisions about lighting, camera angles, and environmental effects on the spot. By moving a significant portion of visual effects work from post-production into the live-action shoot, virtual production gives creative teams unprecedented control and flexibility. It’s less about "fixing it in post" and more about getting it right in the camera from the very beginning. This shift not only streamlines the entire production pipeline but also opens up new possibilities for storytelling.
Virtual Production vs. Traditional Filmmaking
The traditional filmmaking process is very linear, like an assembly line. You have distinct phases: pre-production, shooting, and then a long post-production period where visual effects are added. Creatives often don't see anything close to the final shot until months after filming has wrapped, which can make reshoots expensive and complicated.
Virtual production turns this model on its head. It’s a much more collaborative and iterative process where different departments work together simultaneously. Visual effects are no longer an afterthought; they are an integral part of the shoot itself. This means directors and cinematographers can frame shots against the actual digital background, making more informed creative choices and capturing a near-final image directly in-camera.
How Real-Time Rendering Works
The magic behind virtual production is real-time rendering. It’s a symphony of technologies working in perfect harmony. First, a camera tracking system monitors the exact position and movement of the physical camera on set. This data is fed instantly into a game engine, which acts as the brain of the operation. The engine then renders the 3D virtual environment from the camera's precise perspective.
This newly rendered image is then displayed on the surrounding LED walls. Because this happens in a fraction of a second, the digital background reacts to the camera's movement just as a real-world environment would, maintaining perfect parallax and perspective. This real-time feedback is a game-changer, allowing the entire crew to see the composite shot live and make immediate adjustments.
The Core Tech Behind Virtual Production
Virtual production isn't a single piece of technology but rather a powerful ecosystem where several innovations work in concert. Think of it as a digital stage where the lines between the physical and virtual worlds blur completely. At its heart, this process combines massive LED displays, sophisticated video game software, and precise camera tracking to create immersive, dynamic environments right on set. This fusion of tech allows filmmakers and creators to see their final shots, complete with visual effects, in real time. Instead of imagining how a scene will look against a green screen, you can shoot within the world itself. This approach gives creative teams unprecedented control and flexibility, allowing for on-the-fly adjustments that would be impossible in a traditional workflow. Understanding these core components is the first step to harnessing the full potential of virtual production services for your next project.
LED Walls and Display Systems
Forget the green screen. The most visually striking element of a modern virtual production stage is the massive wall of LED panels. These high-resolution screens wrap around the set, displaying the 3D digital environment created in a game engine. But they do more than just provide a backdrop; they are an active part of the lighting. The light from the digital scene on the LEDs illuminates the actors and physical props with incredible realism, creating natural reflections and ambient light that perfectly match the virtual world. This integration of lighting and environment is what makes the final image so convincing and dramatically reduces the time needed to match live-action and digital elements in post-production.
Budget-Friendly Alternatives
For low-budget setups, high-brightness 4K projectors, high-lumen short-throw projectors, or large OLED TVs can serve as dynamic backgrounds instead of professional LED walls. Additionally, smartphones and tablets using apps like Live Link VCAM can replace expensive professional camera tracking systems by streaming AR-based movement data directly into the engine.
Game Engines for Real-Time Scenes
The "brain" behind the virtual set is a real-time game engine, with software like Unreal Engine leading the charge. These powerful platforms are used to build and render the photorealistic 3D worlds displayed on the LED walls. The term "real-time" is key here—it means the virtual environment is rendered instantly, frame by frame, as you film. This provides immediate visual feedback, allowing directors and cinematographers to experiment with camera angles, lighting, and even environmental changes on the spot. You can move a mountain, change the weather, or shift from day to night with a few clicks, seeing the final result through the camera's lens without the guesswork of traditional VFX.
Accessible Software Toolkit
Creators can build a professional pipeline using free tools: Unreal Engine for real-time environments, Blender for 3D asset and prop modeling, and Aximmetry (Community Edition) for node-based green screen compositing. These tools allow for "virtual cameras" that enable dynamic movements without the need for high-end tracking hardware.
Motion Capture and Tracking Technology
To create a seamless illusion, the virtual world must react perfectly to the movement of the physical camera. This is where motion capture and tracking technology come in. Sensors are attached to the camera, and a tracking system follows its exact position, orientation, and lens settings in 3D space. This data is fed into the game engine, which adjusts the perspective of the digital background in real time. As the camera pans, tilts, or dollies, the virtual world moves with it, creating a perfect parallax effect. This synchronization is what convinces the eye that the actors are truly inside an expansive, three-dimensional space.
Essential Computing Power
Powering this entire operation is a network of high-performance computers. Rendering complex, photorealistic 3D worlds in real time requires immense computational muscle, specifically from top-tier graphics processing units (GPUs). These specialized processors are the workhorses of virtual production, handling the millions of calculations needed to generate each frame without lag. This robust hardware foundation ensures that the virtual production workflow runs smoothly, allowing the creative team to focus on storytelling without being hindered by technical limitations. Investing in the right computing power is essential for achieving the high-fidelity visuals that make virtual production so transformative.
Plan Your Virtual Production: The Pre-Production Phase
In traditional filmmaking, you often hear the phrase, "we'll fix it in post." With virtual production, that mindset is flipped on its head. Success hinges on getting it right in pre-production. This is where the bulk of the creative and technical groundwork happens, shifting most of the visual effects work from the end of the pipeline to the very beginning. Think of it as building your world before you ever step foot on set. By meticulously planning and creating your digital environments, assets, and shot sequences upfront, you establish a seamless and flexible foundation for the actual shoot. This foundational stage is what unlocks the magic of virtual production, allowing for real-time creative decisions, immediate feedback, and dynamic collaboration on set. A well-executed pre-production phase is the key to a smooth and predictable production day, giving your entire team the confidence to experiment and achieve the best possible version of your story. At Arctic7, our transmedia services are built around this principle of front-loading the creative process to build interconnected entertainment experiences that feel cohesive from the start.
Design Your Virtual World and Assets
Before you can shoot in a virtual world, you have to build it. This stage involves using 3D tools to design and create every digital element that will appear on screen, from sprawling alien landscapes to the specific props a character will interact with. Think of it as digital set construction. Instead of building physical sets, your team creates high-fidelity virtual environments and assets that are ready to be loaded into the game engine. This process is incredibly detailed, ensuring that every texture, light source, and object looks and feels real. Our work on Lollipop Racing, for example, involved creating vibrant, stylized vehicles and tracks that became the core of the game's visual identity.
Visualize and Map Out Your Scenes
Once your assets are taking shape, the next step is to visualize exactly how they’ll be used. This is where you translate the director's vision into a clear technical and creative blueprint. The process involves several key steps, including pre-visualization (previs), which is like creating a 3D animated storyboard to map out shots and camera angles. From there, you move to technical visualization (techvis) to plan the precise camera equipment and movements needed to capture those shots within the virtual environment. For action-heavy sequences, stunt visualization (stuntvis) helps choreograph and safely plan complex stunts. This deep level of planning ensures everyone on the creative team is aligned before filming even begins.
Configure Your Tech and Equipment
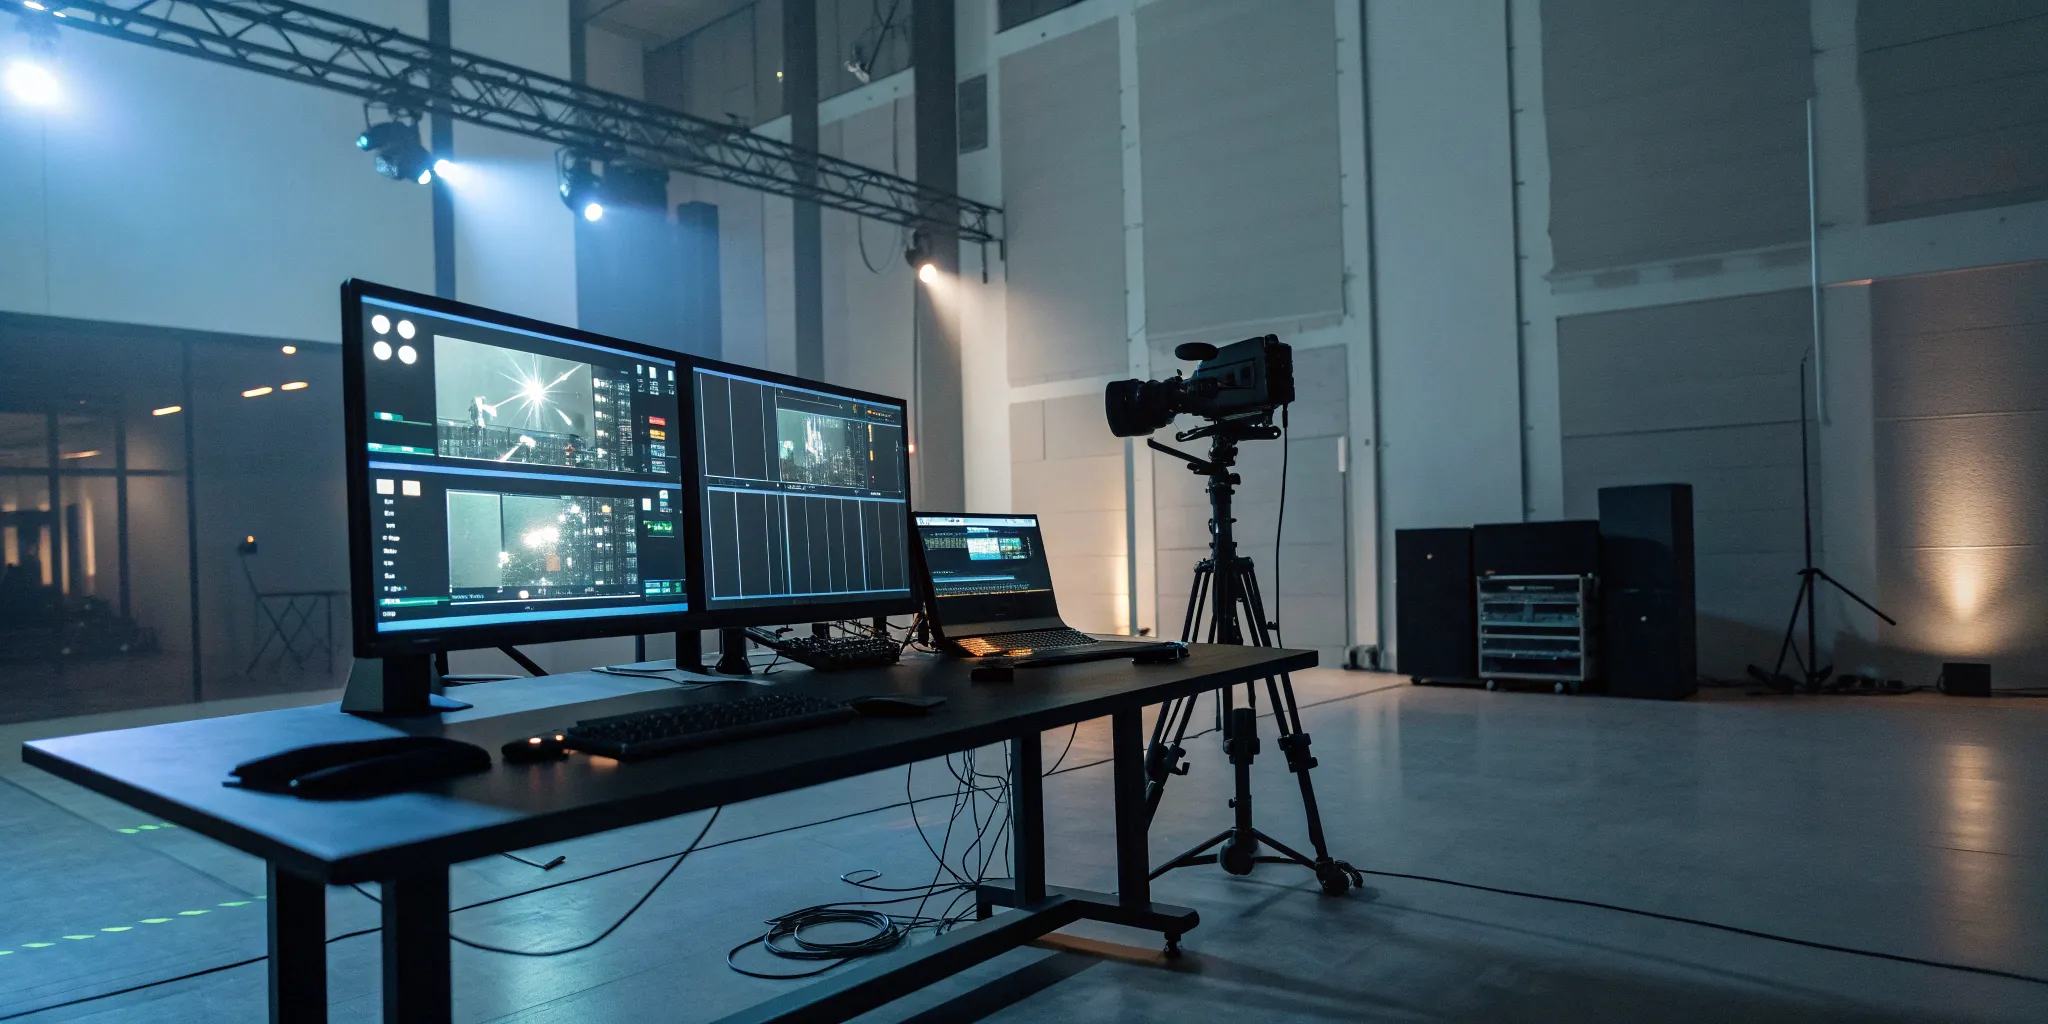
With the digital world built and the scenes mapped out, it’s time to prepare the physical stage, or "the volume." This involves setting up the LED walls and ensuring all the technology is perfectly synchronized. A critical part of this step is calibration, where you align the physical cameras with the virtual world displayed on the screens. This process ensures that as the real camera moves, the digital background reacts with the correct perspective and parallax, creating a seamless illusion of depth and reality. It’s a highly technical process that bridges the gap between your digital assets and the live-action shoot, making it possible for actors and directors to see and interact with the final scene in real time.
Strategic DIY Studio Setup
A DIY studio requires only a controlled space like a garage or basement with sufficient ceiling height and the ability to block all ambient light. When prioritizing a budget, the single most critical investment is a high-performance PC with a top-tier GPU to ensure real-time rendering without lag. To blend real and virtual elements, a basic three-point lighting setup (key, fill, and back light) must be used to match the direction and color of the digital light sources.
Filming in a Virtual World: The Production Stage
After weeks of careful planning, designing, and testing, it’s time to bring your story to life on the virtual stage. This is where the magic of virtual production truly shines, blending the physical and digital worlds in a way that transforms the filmmaking process. Unlike a traditional set, where you’re often working with green screens and imagining the final scene, a virtual production stage is a dynamic, interactive environment. The digital world you built in pre-production is no longer just a concept; it’s a tangible backdrop that your cast and crew can see and react to in the moment.
This stage is about more than just capturing footage. It’s an active, collaborative space where creative decisions happen instantly. The director, cinematographer, and actors can see a close-to-final version of the shot as it’s being filmed, allowing for immediate feedback and adjustments. This real-time workflow collapses the barriers between production and post-production, creating a more fluid and intuitive process for everyone involved. It’s a fundamental shift that empowers creators to experiment and perfect their vision directly on set, ensuring the final product is exactly what they imagined. Our work on projects like Marvel Studios' Ant-Man and the Wasp: Quantumania showcases how this technology can build immersive, otherworldly environments.
Running the Virtual Set
On a virtual production set, the action unfolds in front of massive, high-resolution LED walls that display your pre-built digital environment. These screens do more than just provide a background; they cast realistic light and reflections onto the actors and physical props, seamlessly blending them into the virtual world. As actors perform, motion-tracked cameras follow their every move, and the game engine adjusts the digital scenery’s perspective in real time. This creates a perfect parallax effect, making it look as though the camera is moving through a real, three-dimensional space. This setup gives the entire crew a shared view of the final shot, right as it happens.
Make Creative Changes in Real Time
One of the most powerful aspects of virtual production is the ability to make creative changes on the fly. If a director decides the lighting should be moodier or a key prop should be moved, the virtual production team can adjust those digital assets instantly. There’s no need to halt production to rebuild part of a set or wait for post-production to see the results. This flexibility allows for spontaneous creativity and problem-solving right on the stage. This iterative process means you can experiment with different ideas and refine your shots until they’re perfect, all without costly delays. Our transmedia services are built to support this kind of agile and responsive production environment.
Directing Actors in a Digital Space
For actors, performing on a virtual set is a game-changer. Instead of reacting to tennis balls on a green screen, they are immersed in the world of the story. They can see the fantastical landscapes or futuristic cities surrounding them on the LED walls, which helps ground their performances and makes their interactions with the environment feel more natural and authentic. This immediate visual context allows directors to give more precise guidance, as everyone on set shares the same visual reality. The result is often a more compelling and believable performance, as actors can genuinely react to the world around them.
Putting It All Together: Post-Production
If you’ve worked in traditional filmmaking, you’re familiar with the mantra, “We’ll fix it in post.” Virtual production flips that idea on its head, shifting the focus to “fix it in pre.” Because so much of the creative and technical work is front-loaded into pre-production and the live-action shoot, the post-production phase becomes significantly shorter and more streamlined. This doesn’t mean it disappears entirely; instead, its role changes from a rescue mission to a final polishing stage.
The heavy lifting of world-building, lighting, and compositing happens in real time on set. As a result, your post-production team isn't spending months keying out green screens or building environments from scratch. They receive shots that are already 90% of the way there. This allows them to focus their time and talent on refinement and enhancement, ensuring the final product is as stunning as possible without the lengthy timelines and budget overruns that can plague traditional workflows. This efficient approach is a core part of modern transmedia development, allowing for faster turnarounds and more cohesive storytelling across platforms.
Hybrid Workflow Options
Filmmakers can adopt a hybrid approach by filming actors against traditional green screens and compositing them into real-time environments. This lowers the barrier to entry by reducing on-set hardware demands while still providing the creative flexibility of digital world-building.
Blend Virtual and Live-Action Footage
One of the most impressive aspects of virtual production is how seamlessly it merges digital worlds with live-action performances. On set, the LED walls provide realistic lighting and reflections that interact naturally with actors and physical props, something that’s incredibly difficult and time-consuming to replicate with a green screen. The camera tracking system ensures that as the physical camera moves, the digital background adjusts its perspective in perfect sync.
This means the director and cinematographer can see a near-final composite image directly through the camera during filming. What you see on the monitor is essentially what you get. This eliminates the guesswork and allows for immediate creative adjustments on set, rather than weeks later in an editing suite. For projects like Marvel Studios' Ant-Man and the Wasp: Quantumania, this real-time feedback is crucial for creating believable, immersive worlds.
Apply Color Grades and Final Polish
With most of the visual effects integrated during production, the post-production team can concentrate on adding the final layer of polish. This is where the final color grade is applied to perfect the mood and visual tone of every scene. While the on-set lighting provides a fantastic base, a skilled colorist can add nuance and consistency that ties the entire project together.
This stage is also where any complex digital assets that were too demanding for real-time rendering—like a highly detailed creature or a massive particle simulation—are added. The team might also perform minor clean-up, such as removing wires or refining small details in the composite. Because the foundation is so solid, these tasks are about enhancement, not correction. The result is a faster, more efficient path from filming to final delivery, giving you more creative control throughout the process.
Why Choose Virtual Production? The Key Benefits
Switching to a new production method can feel like a big leap, but the advantages of virtual production are compelling. It’s more than just a technological upgrade; it’s a strategic move that addresses some of the most persistent challenges in traditional filmmaking. By blending the physical and digital worlds in real time, virtual production offers a more efficient, flexible, and creatively liberating way to bring your vision to life. For IP holders looking to expand their worlds, this technology provides the control and quality needed to create immersive experiences that resonate with audiences. Let's break down the three core benefits that are convincing studios and creators to make the change.
Save Time and Reduce Costs
One of the most practical benefits of virtual production is its impact on your budget and schedule. By creating digital environments, you can eliminate the need for expensive and time-consuming location shoots. Imagine filming scenes set in a desert, a futuristic city, and a lush jungle all in the same week, on the same stage. This approach drastically cuts down on travel, logistics, and crew relocation costs. You also gain control over the environment, meaning no more waiting for the perfect light or losing days to bad weather. Changes can be made faster during filming, reducing the need for costly reshoots. This efficiency allows you to allocate resources where they matter most: on screen.
Gain More Creative Freedom and Flexibility
Virtual production hands creative control back to the filmmakers right on set. Unlike a traditional green screen, where you have to imagine the final scene, LED walls display the complete virtual environment in real time. This allows directors, cinematographers, and actors to see the final shot as it’s being filmed. You can adjust lighting, change the time of day, or move a mountain with a few clicks. This immediate feedback loop encourages experimentation and allows for on-the-fly creative decisions that would be impossible otherwise. It removes the physical limitations of a location, empowering your team to build the exact world your story demands, which is a core part of our transmedia services.
Achieve Hyper-Realistic Lighting and Environments
Getting the lighting right is crucial for making a scene believable, and this is where virtual production truly shines. The high-resolution LED walls don’t just serve as a backdrop; they also emit light, casting realistic reflections and shadows onto the actors and physical props. This interactive lighting seamlessly blends the live-action elements with the digital background, creating a level of immersion that is difficult to achieve with traditional compositing. The camera tracks the action, and the background perspective shifts accordingly, maintaining perfect parallax. This technique was famously used to create the stunning and believable worlds in projects like The Mandalorian, proving that you can achieve cinematic quality without leaving the studio.
Prepare for These Virtual Production Challenges
Virtual production opens up a universe of creative possibilities, but like any powerful technology, it comes with its own set of challenges. Thinking about these hurdles ahead of time isn't about getting discouraged—it's about being prepared so you can create a smooth, efficient, and successful workflow. When you know what to expect, you can build a solid plan that accounts for the financial, technical, and educational aspects of making the switch.
The main challenges usually fall into three buckets: the initial financial investment, the need for new technical skills, and some common misunderstandings about how it all works. By tackling these head-on, you can avoid surprises and focus on what really matters: bringing your creative vision to life. Let's walk through each of these so you can feel confident stepping onto a virtual stage.
Managing Upfront Investment Costs
Let's be real: the initial price tag for virtual production can seem steep. Renting or building an LED stage and acquiring the necessary high-powered hardware requires a significant upfront investment. This isn't like booking a traditional location; you're essentially building a custom digital world from the ground up. However, it's helpful to view this as a strategic shift in your budget rather than just an added expense. The money you invest upfront can lead to major savings down the line by reducing travel costs, location fees, and the need for extensive post-production fixes. Proper planning is everything here.
Navigating the Technical Learning Curve
Virtual production blends the worlds of filmmaking and game development, which means your crew will need a unique mix of skills. It can be tough to find team members who are already experts in real-time engines like Unreal Engine and the specific hardware used on a virtual set. This is where having the right transmedia partner becomes invaluable. Investing in training for your existing crew or bringing on specialists is key to a successful shoot. The learning curve is real, but it’s also an opportunity to build a forward-thinking team that’s ready for the future of production.
Learning and Community Resources
New users should focus on learning cinematic basics within Unreal Engine—such as lighting and virtual cameras—rather than coding. Leveraging online communities, Discord servers, and tutorials is essential for troubleshooting and finding collaborative partners to share equipment and skills.
Debunking Common Misconceptions
A few myths about virtual production seem to pop up again and again. One of the biggest is that it completely eliminates post-production. While it’s true that many visual effects are captured in-camera, post-production is still essential for final color grading, compositing, and polishing. Another misconception is that VP reduces the need for VFX artists. In reality, it’s the opposite—VFX teams are more critical than ever, as they are the ones building the incredible digital environments before the cameras even roll. It’s a shift from "fixing it in post" to "creating it in pre."
Assembling Your Virtual Production Team
Your virtual production is only as strong as the team behind it. This new workflow blurs the lines between pre-production, production, and post-production, which means your team structure needs to adapt. It’s less about siloed departments handing off work and more about a unified group of creatives and technicians working together in real time. Think of it as bringing post-production talent, like VFX artists, directly onto the set.
Success in virtual production hinges on a blend of traditional filmmaking expertise and new technical skills. You’ll need people who understand cinematography and directing, but who are also comfortable inside a game engine. This doesn’t mean you have to start from scratch. Many roles on a traditional film set have a counterpart in virtual production; they just require a new set of tools and a more collaborative mindset. The key is to build a team that can communicate effectively across disciplines, solving creative problems on the fly. At Arctic7, we’ve seen firsthand how a well-integrated team can make the technology feel invisible, allowing creativity to take center stage. The goal is to create a fluid environment where directors, artists, and technicians can build and refine the world together, right on the virtual set.
Key Roles and Skills to Look For
Building your team means looking for a mix of artistic and technical talent. You’ll need a VFX Supervisor who understands the entire pipeline, from asset creation to final composite. Real-time 3D artists are also essential; they are the ones who build, light, and modify the virtual environments inside game engines like Unreal Engine. A Technical Director (TD) is crucial for managing the complex interplay between the LED wall, cameras, and software.
Beyond specific roles, look for people who are adaptable and quick to problem-solve. Since you’re making creative decisions live on set, your team needs to be comfortable with a more iterative process. Experience with the core virtual production workflow and its key technologies—including motion tracking systems and real-time rendering—is a huge plus.
How to Train Your Current Crew
You don’t necessarily need to hire an entirely new crew to make the switch to virtual production. Upskilling your existing team is a fantastic way to retain institutional knowledge while embracing new technology. Your talented cinematographers, production designers, and gaffers already have the creative instincts; they just need training on the new tools.
Start by identifying key team members who are eager to learn and enroll them in specialized courses on real-time 3D and virtual production. Many programs are designed specifically to equip filmmakers with these skills. This investment not only prepares your crew for the project at hand but also builds a sustainable virtual production capability within your studio for the future. It’s about evolving your team’s skill set, not replacing it.
Foster Cross-Department Collaboration
In traditional filmmaking, departments often work in sequence. In virtual production, they work in sync. This requires a significant cultural shift toward real-time collaboration. The art department, camera crew, and VFX artists are no longer separated by phases of production; they’re all on set together, making adjustments that are instantly visible on the LED wall.
To make this work, you need to establish clear and constant communication channels. Daily stand-ups and shared digital tools can keep everyone aligned. Encourage a mindset where feedback is shared openly and constructively between departments. This cultural shift to virtual production is fundamental. When your team truly collaborates, you can solve problems faster and achieve a more cohesive creative vision.
Set Yourself Up for Success: Best Practices
Jumping into virtual production can feel like a big leap, but a few core practices can make the transition smooth and successful. By focusing on your technology, processes, and people from the start, you build a solid foundation for your project. This approach helps you avoid common pitfalls and fully leverage the creative power that virtual production offers. It’s less about having a perfect plan and more about having a smart one that allows for flexibility and collaboration.
Choose the Right Hardware and Equipment
Think of your hardware as the engine of your virtual production. Without the right power, you won’t get very far. The detailed, real-time visuals at the heart of this process demand robust computing power, specifically from your graphics cards (GPUs). Investing in powerful hardware is crucial for achieving high-quality results, as it directly affects rendering speeds and the overall efficiency of your workflow. A strong technical foundation ensures your virtual environments look seamless and allows your creative team to work without frustrating delays. This is one area where cutting corners can create significant problems down the line.
Test Your Workflow from End to End
Before you start filming, it’s essential to run a full test of your entire workflow. This means making sure every piece of technology—from the game engine and LED wall to the camera tracking systems—is communicating correctly. The real-time feedback of virtual production lets directors and artists instantly see how shots look, but this only works if all the components are integrated seamlessly. A complete end-to-end test allows you to identify and fix technical glitches ahead of time. This proactive step saves invaluable time on set and empowers your team to make quick, confident creative adjustments during production.
Create a Clear Communication Plan
Virtual production shifts much of the creative and asset-building work to the pre-production phase, making collaboration more important than ever. Your artists, technicians, and directors must be perfectly aligned from day one. Establishing a clear communication plan is essential for keeping everyone on the same page. This includes defining roles, setting up channels for sharing files and feedback, and scheduling regular check-ins. When your team has the right tools and a shared understanding of the project goals, you can streamline the entire process and ensure the final product is a cohesive and compelling world, just like we achieved with our work on Ant-Man and the Wasp: Quantumania.
How to Get Started with Virtual Production
Making the move to virtual production is a significant step, but it doesn't have to be an overwhelming one. Like any new process, it’s about understanding the core components and taking a methodical approach. The transition involves two main areas: planning your financial and technological commitments and adapting your team’s mindset from traditional filmmaking workflows. It’s less about replacing old skills and more about applying them in a new, dynamic environment where creative decisions can happen in real time.
Thinking through these steps early on will set your project up for success. You’ll want to map out your needs, identify potential challenges, and build a team that’s ready to embrace a more integrated and flexible way of creating. For many IP holders and studios, partnering with a team that has deep experience in this space can make all the difference. A dedicated transmedia partner can guide you through the technical setup and creative strategy, ensuring your first venture into virtual production is a smooth one. Let’s look at the first practical steps you can take.
Plan Your Budget and Technology Investments
The financial side of virtual production is often the first hurdle. There are significant upfront costs, especially when it comes to renting LED stages and acquiring the necessary technology. To handle the detailed, real-time visuals, you’ll need to invest in good hardware, particularly powerful graphics cards (GPUs) that can keep up with the demands of the game engine.
However, it’s important to view these as strategic investments that can lead to greater cost efficiency down the line. Virtual production can be quicker and ultimately cost less than traditional methods, largely by eliminating the need for expensive travel and location shoots. Instead of flying a whole crew across the world, you can bring the world to your stage. This shift not only saves money but also gives you more control over your shooting environment, reducing the risk of weather delays or other on-location complications.
Make the Switch from Traditional Methods
Virtual production represents the next step in filmmaking’s evolution, blending physical and digital worlds in a way that was previously impossible. The biggest operational shift is that much of the visual effects work happens before and during filming, not just after. This front-loaded approach means your digital environments, assets, and effects are ready to go on day one of the shoot, allowing for a more seamless integration of virtual and live-action elements.
This change requires a new way of thinking. Your team will be making creative decisions on set that were once reserved for post-production. As the camera moves, the virtual background moves with it realistically, giving directors and cinematographers immediate feedback. This allows them to experiment with shots, lighting, and environments in real time, creating a more collaborative and creatively fulfilling process on the virtual set.
Related Articles
- Ant-Man and the Wasp: Quantumania: A Case Study in Global Virtual Production | Virtual Production
- Interview: Film & TV Services Explained | Virtual Production
- Virtual Production
- Services
Frequently Asked Questions
Is virtual production only for huge sci-fi or fantasy projects? Not at all. While it’s famous for creating otherworldly landscapes, virtual production is incredibly versatile. Think of it as the ultimate tool for environmental control. It’s perfect for historical dramas that need specific period backdrops, car commercials that require perfect lighting on reflective surfaces, or any project where traveling to a remote or expensive location isn't practical. If your story needs a setting that is difficult, costly, or impossible to shoot in reality, virtual production is a powerful solution.
Does this mean I don't need a post-production team anymore? Post-production is still absolutely essential, but its role changes dramatically. Instead of spending months on foundational tasks like removing green screens and building digital worlds from scratch, your post-production team gets to focus on refinement. They handle the final color grade, add any highly complex visual effects that couldn't be rendered in real time, and apply the final polish that makes the project shine. The process becomes less about fixing problems and more about enhancing an already beautiful shot.
How does virtual production change the creative process for a director on set? It completely transforms the experience from one of imagination to one of interaction. Instead of guessing how a scene will look after visual effects are added, a director can see a near-final version of the shot live through the camera. This allows for immediate, confident decisions about camera placement, lighting, and composition. It also helps actors deliver stronger performances because they can see and react to the world around them, making the entire process more collaborative and intuitive.
What's the most important thing to get right in pre-production? Your digital assets are everything. The success of a virtual production shoot depends almost entirely on the quality and optimization of the 3D environments you build beforehand. This is where the real work happens. Meticulously creating, testing, and finalizing your virtual worlds before you ever step on the stage ensures that everything runs smoothly during the shoot. A well-planned and beautifully executed digital set is the foundation for the entire project.
Do I have to build my own virtual production stage to get started? Definitely not. Building a permanent LED stage is a massive financial and technical undertaking. The great news is that you don't have to. Most studios and creators get started by renting time at an existing virtual production facility or by working with a partner who has access to the technology and the specialized crew needed to operate it. This makes the process far more accessible and allows you to focus on the creative side without worrying about the hardware.
New Immersive & XR Media Capabilities Added to Arctic7's Suite of Games, Film & TV and Digital Services

Arctic7 Shares Details of its Work on Skeleton Crew and Cinematics Partnership with Fateless

The Human Touch: Adding Personality to Project and Product Management
Whether it’s your team, your client, or your stakeholders, understanding the human dynamics is just as critical as hitting milestones.

McDonald's Case Study: Bridging Brand and Play | Arctic7
Bridging Brand and Play: An Interview with Lindsay Blenkhorn Daggitt